3. Bring cord A under cord B , and around through the center loop.
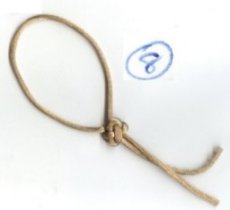
8. If you're lucky, the knot will fall into its basic shape. Adjust as necessary.
Button Knot using Two Cords
Use this knot if you are working with 2 cords instead of one.
|
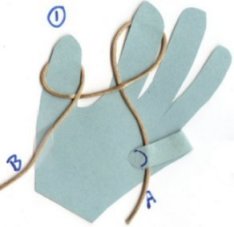
1. Wrap the cords around the index finger and thumb as shown. If you have other knots, beads or a pendant already on the cord, they would be placed behind your index finger) |
|
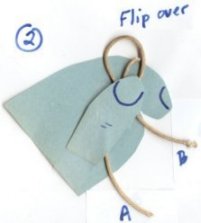
2. Lift the loop off the thumb, turn it counter-clockwise , and place it over the loop on the index finger. |
|
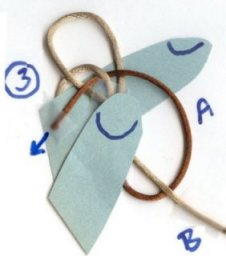
3. Bring cord A under cord B , and around through the center loop. |
|
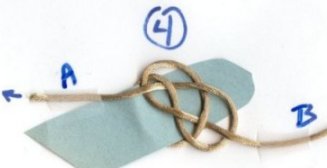
4. You should now have a symmetrical knot with a defined center area. Remember this center area. Both cords will ultimately exit the knot through this area. |
|
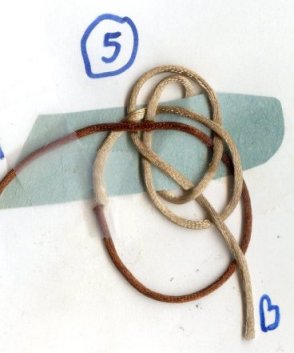
5. Bring cord A under cord B and up through the center area. Leave a little bit of loop in cord A : don't pull it too tight. |
|
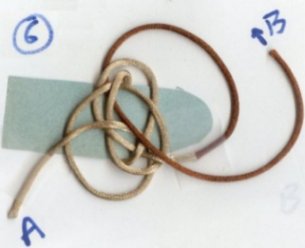
6. Bring cord B around over the top of the knot, past the loop over the index finger, and down through the center area. At this point, both cords should be coming out of the center area. |
|
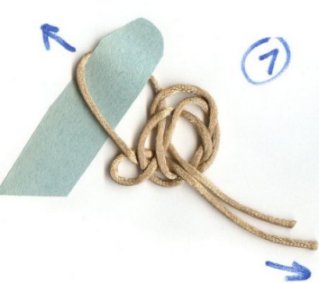
7. Grasp both cords. Begin to pull the cords gently in one direction, and the loop behind the finger in the opposite direction. The knot should begin to form. The outer edges of the knot should slant back towards the index finger. |
|
8. If you're lucky, the knot will fall into its basic shape. Adjust as necessary. |
To move the knot, follow the same procedure as with the regular button knot. Push the cord into the knot until you can identify which loop to pull. Pull the loop until the knot is in the desired position. Then turn the knot and tighten the loops. Since you have 2 separate cords, instead of pulling through 8 loops, you will pull through two groups of four loops.